What Happens During an Aircond Chemical Wash? Step-by-Step
Ever wondered what technicians actually do during a chemical wash? This step-by-step guide shows the complete process from dismantling to testing.
You know how the heat in Kepong and Kuala Lumpur can feel heavy, especially when your air conditioner just isn’t cutting it. We see this every day with older units that sound like they are working hard but barely cooling the room.
Most homeowners think a basic filter clean is enough.
From our experience servicing thousands of homes, a simple wash often misses the sticky “jelly” buildup deep inside the machine that blocks airflow.
We are going to walk you through exactly what happens during a professional chemical wash so you can see why it is the standard for restoring older units.
Overview: The Chemical Wash Process
A professional chemical wash is not a quick wipe-down. This service takes 60-90 minutes per unit because it involves completely dismantling your indoor unit to reach the hidden evaporator coil.
We strip the unit down to its core components.
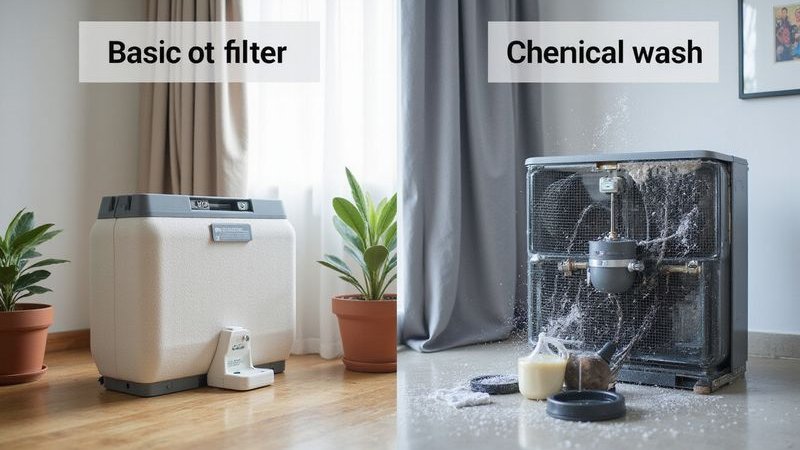
Comparing this to a general service helps clarify the value.
| Aspect | General Service | Chemical Wash |
|---|---|---|
| Duration | 20-30 minutes | 60-90 minutes |
| Disassembly | Partial (Cover only) | Complete (To the skeleton) |
| Cleaning Agent | Water/Mild Soap | Alkaline Chemical Solution |
| Target Area | Surface Filters | Deep Coil & Blower Wheel |
| Frequency | Every 3-4 months | Every 12 months |
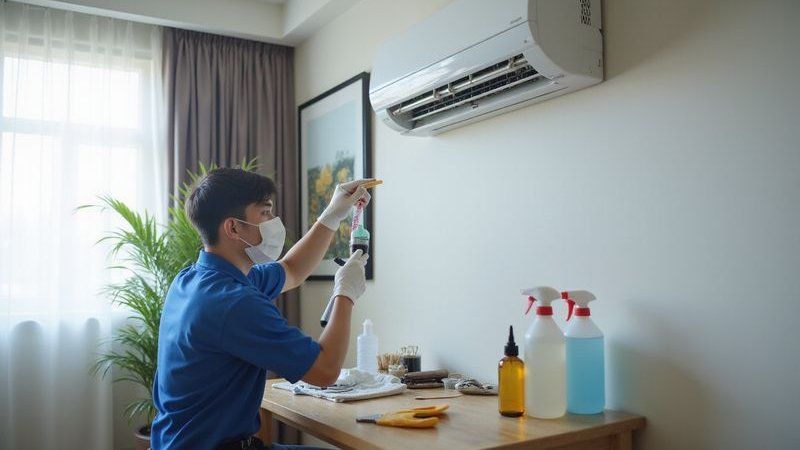
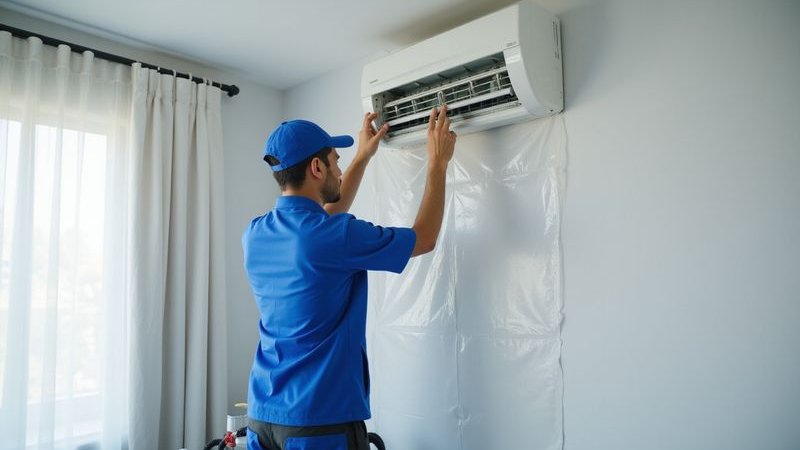
Step 1: Preparation and Inspection
Time: 5-10 minutes
Safety and diagnostics come first. We don’t just start spraying water.
Our technician begins with a health check:
- Site Inspection: We look for watermarks on the wall or existing damage to the casing.
- Performance Test: A thermal gun measures the current temperature difference between air intake and output.
- Area Protection: Canvas sheets are laid down to protect your furniture and flooring from water splashes.
- Electrical Safety: The power source is isolated to prevent short circuits during the wet cleaning phase.
Homeowners often tell us about specific annoyances during this stage. Please let the technician know if you hear water dripping or rattling sounds at night.
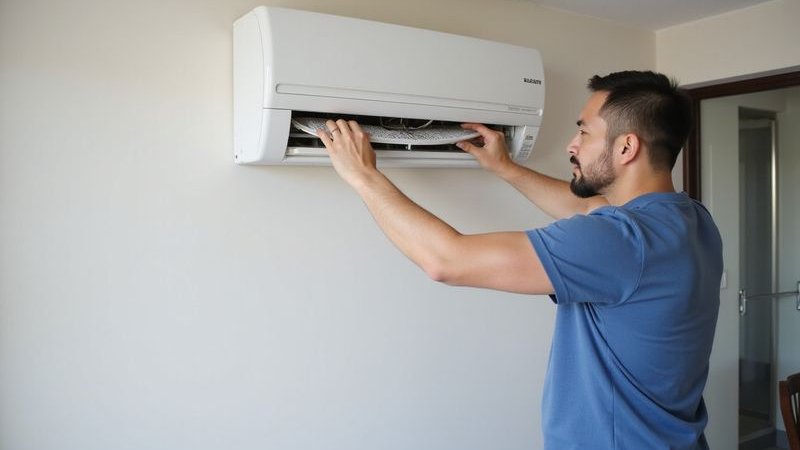
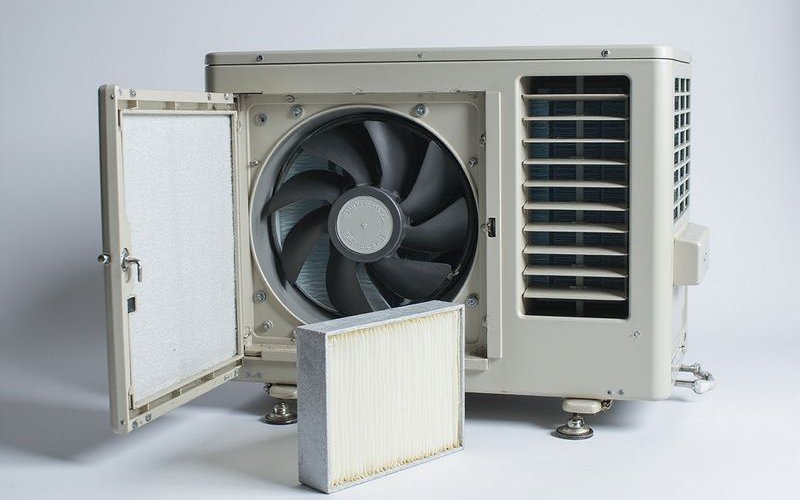
Step 2: Dismantling the Indoor Unit
Time: 10-15 minutes
This phase separates a true expert from a novice. We carefully remove the outer layers to expose the machine’s internal organs.
The parts removed include:
- Front Cover and Filters: These are the first lines of defense against dust.
- Drainage Tray: This is where the notorious “jelly” (biofilm) builds up and causes leaks.
- Fan Blower: The cylindrical roller that throws the air into your room.
- PC Board (Motherboard): This delicate computer brain is either removed or wrapped in waterproof plastic.
Accessing the evaporator coil is the main goal here. If a technician does not remove the fan blower or drainage tray, they cannot reach the mold hiding behind them.
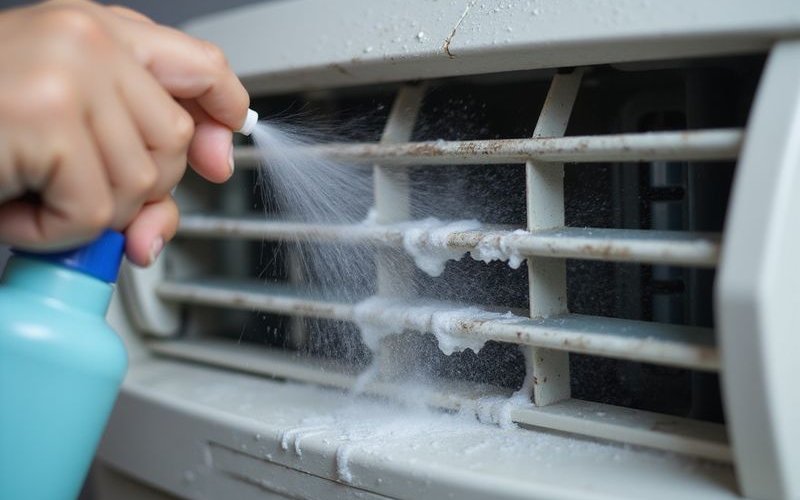
Step 3: Chemical Cleaning of Evaporator Coil
Time: 15-20 minutes
The evaporator coil consists of thin aluminum fins that trap coldness. Over time in Malaysia’s humidity, these fins get clogged with a mixture of dust and moisture that turns into hard sludge.
The cleaning protocol:
- Pre-rinse: Water is used to loosen the top layer of dry dust.
- Chemical Application: We spray a biodegradable alkaline-based cleaner that penetrates between the tight metal fins.
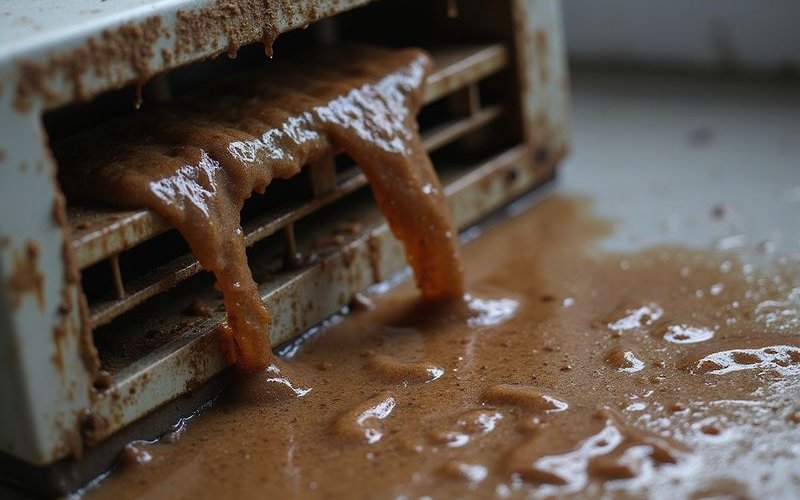
- Reaction Time: The solution sits for 5-10 minutes. You might see it foaming slightly as it eats away organic matter and grease.
- High-Pressure Flush: A jet spray pushes water through the coil, forcing the dissolved gunk out into a collection bucket.
Alkaline cleaners are crucial because they are effective yet safe for the metal.
Acid-based cleaners, which some low-cost providers use, can corrode the copper pipes and cause gas leaks later.
You will see black or brown water flowing out during the rinse. That dark water is the mold and bacteria that you have been breathing in.
Step 4: Cleaning Removed Components
Time: 15-20 minutes
While the main coil drips dry, attention shifts to the parts sitting on the bathroom floor or balcony.
Fan Blower and Roller
The roller blades are curved to scoop air. We scrub each blade individually because even a millimeter of dust here reduces wind strength by up to 30%. A clean blower restores that powerful “whoosh” sound you want to hear.
Drainage Tray
This tray is a breeding ground for bacteria. We:
- Scrub away the slime layer.
- Flush the drainage pipe with water and chemicals to clear potential clogs.
- Test the flow to ensure water runs out quickly.
Clearing the drainage line now prevents the midnight water leaks that ruin painted walls.
Filters and Casing
Plastic covers get a thorough soap wash. Your unit will look bright and white again, removing that yellowed, aged appearance caused by grime.
Step 5: Reassembly
Time: 10-15 minutes
Putting the unit back together requires precision. We reverse the dismantling steps with care.
- Drainage Tray Alignment: Ensuring the tray is angled correctly to encourage flow.
- Blower Installation: Tightening the set screw so the fan spins without wobbling.
- Wiring Reconnection: Snapping the electrical clips back into the motherboard.
- Casing Closure: Pressing the panels until they click firmly into place.
Technicians check that no wires are pinched. A pinched wire can lead to a tripped breaker down the road.
Step 6: Gas Check and Top-Up
Time: 5-10 minutes
Refrigerant gas (like R32 or R410A) should not run out unless there is a leak. However, pressures can fluctuate.
Important: At AC Service Pro, gas top-up is included FREE with chemical wash.
Our technician performs these checks:
- Pressure Reading: Gauges are attached to the outdoor compressor.
- Leak Check: Valves are inspected for oily residue which indicates a leak.
- Restoration: We add refrigerant if the pressure is below the manufacturer’s specification.
Low gas pressure often causes ice to form on the pipes. By standardizing the pressure, we ensure the compressor doesn’t overheat while trying to cool your home.
Step 7: Testing and Verification
Time: 5-10 minutes
The job isn’t done until the room feels cold. We run the unit on full power for a final audit.
The Verification Checklist:
- Airflow Strength: The wind should reach the far end of the room.
- Cooling Delta: The air coming out should be at least 8°C to 12°C colder than the room temperature.
- Sound Check: The unit should run quietly without vibration.
- Swing Function: The louvers should move smoothly up and down.
We will verify these results with you before packing up.
What to Expect During the Service
Your Role
- Please ensure someone is home to grant access.
- Move fragile items away from the work area.
- Feel free to watch. We are happy to explain what we are doing as we work.
Normal Observations
- Slight Smell: The chemical scent dissipates quickly, usually within 30 minutes of running the fan.
- Noise: The pressure jet machine makes a sound similar to a vacuum cleaner.
Warning Signs of Poor Service
- Skipping the Blower: If they don’t take the roller out, it’s not a full chemical wash.
- Speed: Completing the job in 20 minutes is impossible for this level of cleaning.
- No Pressure Check: If they don’t check the gas outside, they haven’t finished the job.
After the Chemical Wash
Immediate Results:
- Airflow that reaches across the room.
- Fresh, odorless air.
- Silent operation (no more straining fan sounds).
Long-term Wins:
- Energy Savings: A clean unit uses 15-20% less electricity, which you will notice on your next TNB bill.
- Healthier Air: Reduced mold spores mean fewer sinus issues for your family.
- Longevity: Removing the strain on the motor helps the unit last years longer.
How Often Should You Get Chemical Wash?
Malaysian weather works air conditioners hard.
- Residential (Standard Usage): Once every 12 months.
- Heavy Usage (Sleep & Day use): Every 6 months.
- Ground Floor/Roadside: Every 6 months due to higher dust levels.
You should book immediately if you see water leaking or black specks blowing out of the vent.
Ready to restore your unit’s cooling power? Book your chemical wash with AC Service Pro at 012-2252 623. We include FREE gas top-up with every chemical wash service.
Tags
AC Service Pro Team
Our team of experienced HVAC technicians shares practical tips to help you maintain your aircond and save on energy costs.
Ask Us a Question