How to Clean Your Aircond Filter (Easy DIY Guide)
Step-by-step guide to cleaning your AC filter at home. Learn the right technique, frequency, and when it's time to replace your filter.
How to Clean Your Aircond Filter (Easy DIY Guide)
Cleaning your aircond filter is the single most important maintenance task you can do yourself. It takes just 15 minutes, costs nothing, and can dramatically improve your AC’s performance. Here’s exactly how to do it right.
Why Filter Cleaning Matters
You know that feeling when you turn on the AC, but the room just stays sticky and warm? That’s usually a choked filter at work. From our experience servicing thousands of units across Kepong and KL, a simple layer of dust is often the only thing standing between you and a cool night’s sleep.
We have seen dirty filters cause more than just discomfort. The Department of Energy reports that a clogged filter forces your unit to use 5% to 15% more energy. In Malaysia, where TNB bills can skyrocket during heatwaves, that inefficiency hits your wallet directly.
A clean filter prevents these costly issues:
- Blocks airflow: Your AC has to work twice as hard to push air through the grime.
- Reduces cooling: Less air passing over the cooling coil means the room temperature drops slower.
- Increases electricity bills: A unit running longer cycles consumes significantly more power.
- Causes freezing: We frequently find ice forming on coils because restricted airflow traps the cold inside.
- Affects air quality: A dirty filter becomes a breeding ground for mold spores that get blown back into your room.
The key takeaway: Regular cleaning isn’t just about hygiene. It is a direct way to lower your monthly expenses.
How Often to Clean
The standard “every month” advice doesn’t always apply here in the Klang Valley. Our high humidity levels (often exceeding 80%) mixed with city dust create a “jelly-like” buildup that clogs filters faster than dry dust does.
| Usage Level | Climate/Condition | Frequency |
|---|---|---|
| Heavy (8+ hrs daily) | Humid/Urban (KL City Center) | Every 2 weeks |
| Moderate (4-8 hrs daily) | Average Residential | Every 3-4 weeks |
| Light (occasional) | Guest Rooms | Every 4-6 weeks |
| Haze Season | API 100+ | Every 1 week |
In Malaysia: During haze season or if you live near major construction (like the MRT lines), you should check your filters weekly. Fine particulate matter clogs the mesh incredibly fast.
What You’ll Need
You don’t need a specialized kit. In fact, you likely have everything in your kitchen right now.
- Access to water: A bathroom sink or outdoor hose works best.
- Mild dish soap: Brands like Sunlight or Glo are perfect (avoid harsh chemical cleaners).
- Soft brush: An old toothbrush or a soft paint brush helps remove sticky dust.
- Towel: For patting the frame dry.
- Vacuum cleaner: Optional, but great for the initial dust removal.
Pro Tip: Avoid using stiff-bristled scrubbing brushes. These can tear the delicate nylon mesh found in older York or Panasonic models.
Step-by-Step Cleaning Guide
Step 1: Turn Off Your Aircond
Safety is your priority here. Switch off the unit using your remote control first. Then, locate the isolator switch (the dedicated power switch usually found on the wall next to the unit) and turn that off too. This prevents the unit from accidentally turning on and stops dust from being sucked deeper into the machine while you work.
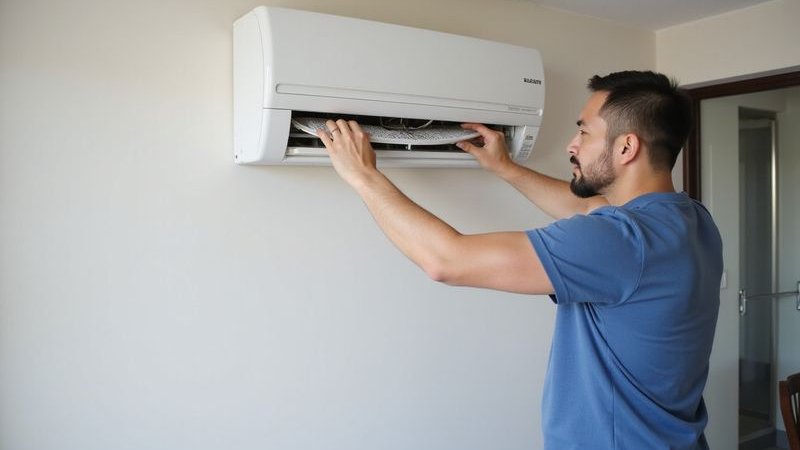
Step 2: Open the Front Cover
Most wall-mounted units in Malaysian homes (Daikin, Panasonic, Acson) share a similar hinged design.
- Find the indentations: Look for small grooves or tabs on the left and right sides of the plastic front panel.
- Pull gently: Place your fingers in the grooves and pull toward you. You might hear a small “pop” as the clips release.
- Lift until it locks: Raise the cover until it stays open on its own. Some older models have a small plastic arm on the right side that you must manually prop up.
Tip: If the cover feels stuck, don’t force it. Wiggle it gently from side to side to loosen the plastic clips, which can become brittle over time.
Step 3: Remove the Filters
With the cover up, you will see two curved mesh screens covering the metal fins.
- Find the tabs: Look for the small plastic handles at the bottom of each filter.
- Push up, then pull down: Push the tab slightly upward to unhook it from the holding slot, then gently slide the filter down and out.
- Check for clips: Some Acson models have small additional clips that need to be released before sliding.
Handle with care. The plastic frames on units older than 5 years can snap easily if you pull too hard.
Step 4: Inspect the Filters
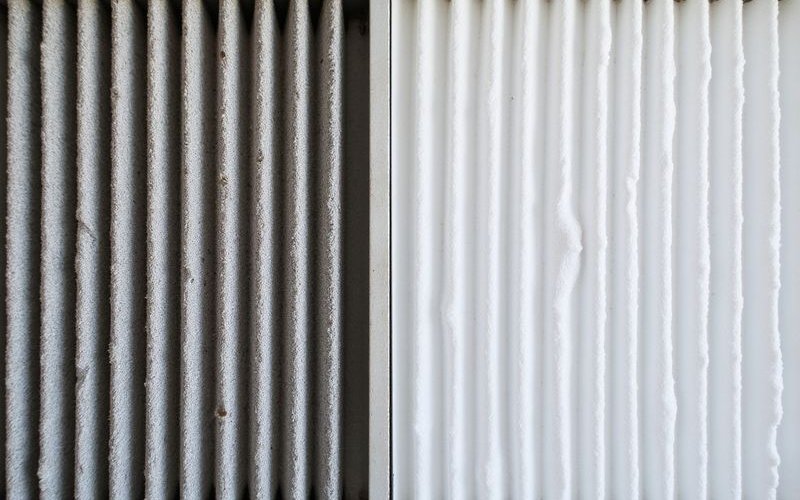
Take a moment to look at what you’re dealing with before washing.
- Light grey dust: This is normal and easy to clean.
- Thick, fuzzy coating: You are overdue for a clean; your airflow was likely reduced by 50% or more.
- Sticky, black residue: This is often a mix of cooking grease and dust, common if your AC is near the kitchen. You will definitely need soap for this.
- Holes or tears: It is time to buy a replacement. A torn filter lets dust go straight into the cooling coil.
Step 5: Vacuum (The “Dry” Clean)
We highly recommend vacuuming before wetting the filter. If you skip this, the water turns the thick dust into a muddy sludge that is harder to rinse off.
- Lay the filter flat on a towel or the floor.
- Use the soft brush attachment on your vacuum.
- Gently run it over the front side of the filter (the side that faced the room).
Step 6: Wash the Filters
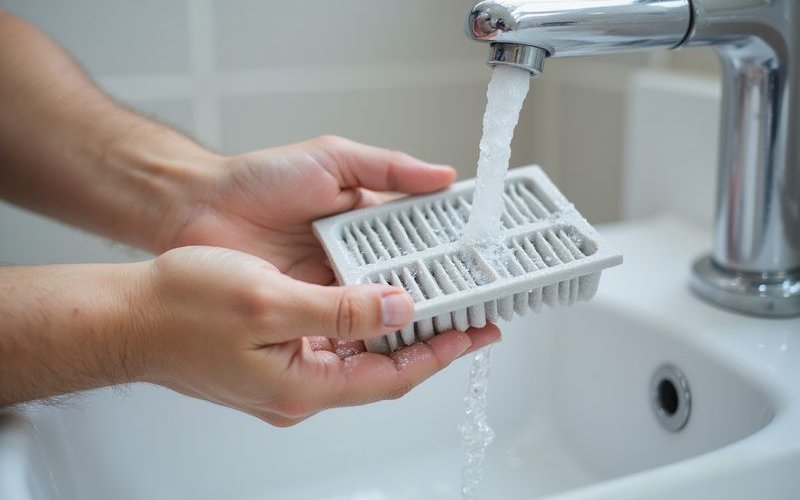
Method 1: The Rinse (For Light Dust)
- Hold the filter under lukewarm running water.
- Crucial Step: Rinse from the back side (the side that faced the coils). This pushes the dust out the way it came in. If you rinse from the front, you just push dust deeper into the mesh.
Method 2: The Soap Wash (For Sticky Grease)
- Fill a basin with room-temperature water.
- Mix in a teaspoon of mild dish soap (like Glo).
- Submerge the filter and gently move it around for 10-15 minutes.
- Use a soft sponge to wipe away stubborn grime.
- Rinse thoroughly until no bubbles remain.
Important: Never use hot water. Water above 40°C can warp the plastic frame, making it impossible to fit back into the slot.
Step 7: Dry Completely
This is where many homeowners make a critical mistake.
- Shake off excess water gently.
- Pat the frame dry with a clean towel.
- Lean the filters against a wall in a shaded, airy spot.
- Wait 30-60 minutes until they are bone dry.
A warning on drying: Do not put your filters in direct sunlight. The intense Malaysian afternoon sun serves to make the plastic brittle and prone to cracking. Never use a hair dryer for the same reason.
Step 8: Clean the Filter Slot (Optional)
While the filters are drying, look at the exposed unit on the wall.
- Take a slightly damp cloth.
- Wipe the plastic edges where the filter sits.
- Wipe the underside of the front cover (mold often hides here).
- Do not touch the sharp metal fins (cooling coil) with your hand or a cloth. They are sharp and easily bent.
Step 9: Reinstall the Filters
- Double-check that the mesh is completely dry. Installing a wet filter encourages mold growth inside the unit.
- Slide the filters back into the guide rails.
- Push the bottom tabs until they click or hook securely into place.
- Close the front cover and press the bottom corners until they snap shut.
Step 10: Test Your AC
- Turn the isolator switch back on.
- Use the remote to power up the unit.
- Stand in front of the vents—you should feel a stronger, fresher breeze immediately.
Common Mistakes to Avoid
We see these errors frequently during our service calls. Avoiding them will extend the life of your filters.
| Mistake | Why it’s bad |
|---|---|
| Using hot water | Warps the filter frame so it no longer seals gaps. |
| Scrubbing with hard brushes | Tears the fine nylon mesh, rendering it useless. |
| Drying in the sun | UV rays make the plastic frame brittle and snap. |
| Using bleach/Clorox | Degrades the mesh material chemically. |
| Installing wet filters | Creates a humid environment for mold and smells. |
| Vacuuming wet filters | Turns dust into mud that clogs the vacuum and filter. |
When to Replace Instead of Clean
Filters are durable, but they aren’t immortal. You should replace them if you notice:
- Holes or tears in the mesh (even small ones let dust through).
- Permanent discoloration or stubborn mold spots that won’t wash off.
- Warped frames that leave gaps when installed.
- Brittle plastic that cracks when you touch it.
Replacement cost: Generic filters can cost as little as RM20-RM50 online or at hardware shops in Jalan Ipoh or Pudu. It is a small investment to protect a machine worth thousands.
Special Filter Types
HEPA & PM2.5 Filters
Many modern units (like newer Panasonic Nanoe models) come with extra inserts.
- These are usually small, rectangular strips attached to the main mesh.
- Do not wash these. Water ruins their structure.
- Replace them every 6-12 months depending on usage.
Carbon/Deodorizing Filters
These are the black or dark grey strips meant to absorb odors.
- They are generally not washable.
- Vacuuming them gently can extend their life slightly.
- Sunlight exposure for an hour can sometimes “recharge” the carbon, but check your manual first.
Electrostatic Filters
These are rare in standard wall units but common in older premium models.
- They carry a static charge to trap dust.
- Wash them carefully with water only; soap can sometimes interfere with the coating.
Signs Your Filter Needs Cleaning Now
Don’t wait for a calendar reminder if you see these signs:
- Visible dust forming a “sweater” on the filter surface.
- Weak airflow even when the fan is set to High.
- Warm air coming out for the first 10-15 minutes.
- Musty smell (like damp socks) when you first turn it on.
- Sudden spike in your electricity bill without extra usage.
Filter Cleaning Schedule
Stick to this simple schedule to keep your unit efficient.
| Reminder | Action |
|---|---|
| Every 2 weeks | Clean mesh filters (Heavy usage/Haze). |
| Monthly | Inspect visually for tears or mold. |
| Quarterly | Deep clean with mild soap. |
| Annually | Consider replacing the filters entirely. |
Beyond the Filter
Cleaning the filter is step one, but it doesn’t clean the heavy grime deep inside the machine.
- Standard service every 4-6 months: A technician cleans the blower wheel and water tray, which you can’t reach.
- Chemical wash annually: This is a deep overhaul for units that haven’t been serviced in years or have a jelly blockage.
- Check the outdoor unit: Ensure leaves or stray plastic bags aren’t blocking the fan at the back of your house.
Quick Reference
- Cleaning Time: 15 minutes active work.
- Drying Time: 30-60 minutes (Shade only!).
- Frequency: Every 2 weeks for best savings.
- Tools: Water, dish soap, towel.
- Cost: Free.
Want a more thorough clean? While filter cleaning is great maintenance, professional servicing reaches components you can’t access, like the blower wheel and cooling coil. Contact AC Service Pro at 012-2252 623 for standard cleaning or chemical wash services.
Tags
AC Service Pro Team
Our team of experienced HVAC technicians shares practical tips to help you maintain your aircond and save on energy costs.
Ask Us a Question